Call yourself lucky if you have an area that is adjoined with your house where not only you can relax but also engage yourself into different sports activities. Yup, we are talking about a patio!
Having a patio to relax is great but a lot of times, rain or the too direct sunlight can end up disturbing your peaceful time. To avoid this from happening, you will need to install a patio roof.
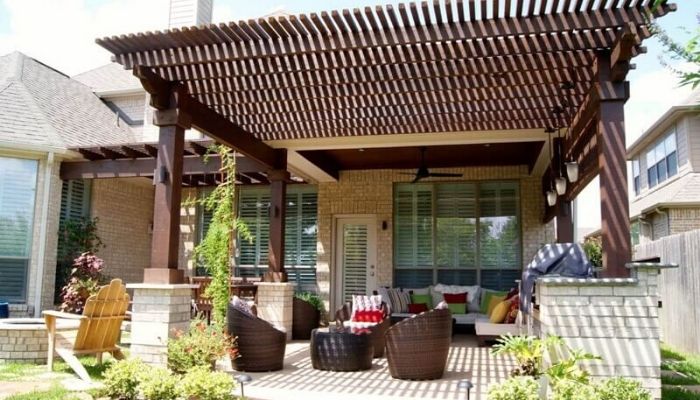
By adding a patio roof, you won’t only make your house look more sophisticated but also make it look different than the other nearby houses.
Besides, it also adds beauty to your house and protects you from the sudden rain and glaring sunlight.
For this, we think, we should share some techniques of how you can attach a patio roof to your house.
Techniques to Attach a Patio Roof
There are several methods of attaching a patio roof to an existing roof among which some ways are:
- Directly Fix The Back Channel: In this process, you will have to strengthen the fascia and back channel via reinforcing the 2 rafters inside the roof. The step will be very easy and simple. However, It will not let you go low or high.
- Make the roof higher: You will have to take out the house gutter and put the back channel slightly higher so you can make the patio roof higher. Once you remove the gutter, you can install transfer flashing to the patio from the roof. It will let you add around a 100 mm of additional height or more.
- Install Some Riser Brackets: If you’d like to reach a particular height, you can raise the roof of the patio using riser brackets. The raised roof with the brackets would require a custom barge cap. Not only it will let you lift the ceiling up to 2ft, but offer different options for the finishing look as well. If you want to get some natural light, then opting for opaque twin wall sheeting will be great. Because, this will let natural light pass through to give you splendid view.
- Let The Air Flow While Blocking Elements: The ultimate purpose of attaching a patio roof is that it keeps you from sunrays and rain. Sadly, it also tends to end up blocking the airflow sometimes. To let the air circulate and avoid the rain splash, you have to put the patio sheeting over the roof top of about 300mm so it can provide you with a barrier from the water without blocking air circulation.
- Get the cleanest look: The people who want a clean and clear look might go for this one. Just by attaching the patio and the back channel directly to the wall, you can get the cleanest look. Not only look, but also you will get better protection from rain.
- Lift The Roof By 500mm: Lift the roof up to 500mm by taking out the gutter, fascia and eaves. The back channel should be directly connected to the rafter and then strengthened. This technique will provide you with a clean finish connected to the wall line.
Now let’s talk about how you can attach a patio roof to an existing house.
In order to attach a patio roof you have to follow some steps. After a lot of research, we have narrowed down some steps following which you can complete this task more easily and safely.
But prior going to the steps, you need to know about the tools and materials that you will need in attaching a patio roof. It is very essential to grab the appropriate tools or else you might get hurt or your safety might get compromised.
Also you have to look for high quality materials for the patio roof. This will help in making the roof strong and that it can stay firm and withstand all kinds of weather.
The tools and materials required for this task are listed below:
Tool and Materials:
- Wooden beams
- Wooden rafters
- Nail gun
- Nails
- Lag bolts
- Ledger
- Utility knife
- Roofing shingles
- Aluminum Flashing
- Power Drill
- Oriented Strand board
- Black roofing felt
- Screwdriver
Using these tools and materials, you can attach a high standard long lasting patio roof to your house.
Now the Steps:
- At first, you have to calculate the sightline clearance height from the roof to the house not from the house to roof.
- Next, you have to determine the beam size you want to use.
- As you are installing the roof on top of your existing house, you might want to consider if you want to remove the existing eave or keep it.
- Then you have to fix how many beams, rafters and roofing planks you will need for your design.
- You have to stain your wood pieces in order to protect them from outdoor elements.
- After that you have to fasten the post base to the ground using lag bolts and a screwdriver. Ensure that they sit plumb.
- You have to cut one side of the horizontal beam on an angle. You should do this very carefully to make rafters it flush on it.
- With the nail gun, you have to attach the horizontal beam and then cut the two outer rafters so that they sit flush on top of the existing house roof.
- You have to now install the outer rafters and attach these rafter beam to the existing roof’s edge.
- After installing the rafters, you should cut the house end so that it fits the top of rafter beam.
- Now check whether all the rafters are fitted properly. After that, make sure to attach your planks horizontally across the rafters so that you can form the patio roof you want.
- If you want to cover your patio roof with shingles that match your existing roof, then you have to add a layer of oriented strand board and black roofing felt.
- After you install then, you can now attach the roofing shingles.
How to Lay Patio Pavers on Dirt